


There are a few ways in SharePoint 2013 to create new publishing pages in the Pages library, but some of those methods have significant side effects or problems and should be avoided. In this post, I’ll show the proper way to create a Publishing Page in 2013 (hint: use the Site Actions menu).
Overview
In SharePoint 2013, there are a few ways to create Publishing Pages, but some of those methods have problems and should be avoided. I’ll describe the various methods and their side-effects, and tell you why the Site Actions menu is the best method to use.
Create Pages from The Ribbon
A familiar method from SharePoint 2010 to create pages is to use the Ribbon when viewing the Pages library. In 2010, content authors would normally navigate to View All Site Content, click on the Pages Library, and then create pages from the Ribbon’s File > New Document button:
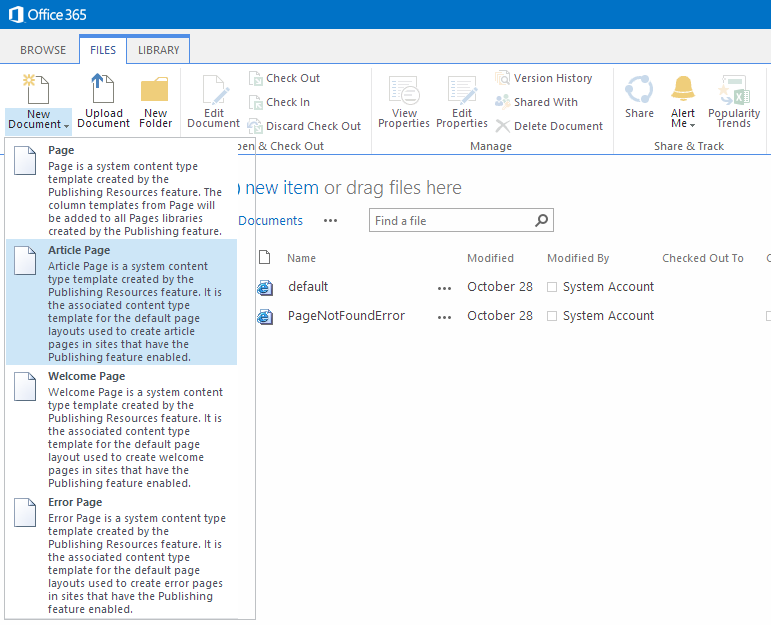
Creating a publishing page from the ribbon on the Pages library.
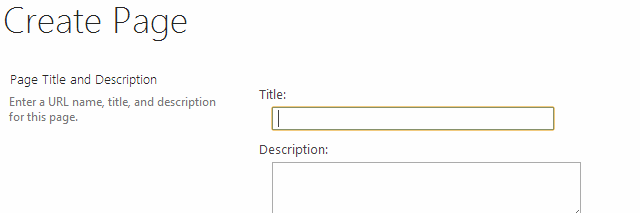
This method is pretty familiar, and lets you immediately select the desired Content Type for your page to use. Once you select the Content Type, you get the Create Page dialog, where you can select the Page Layout:
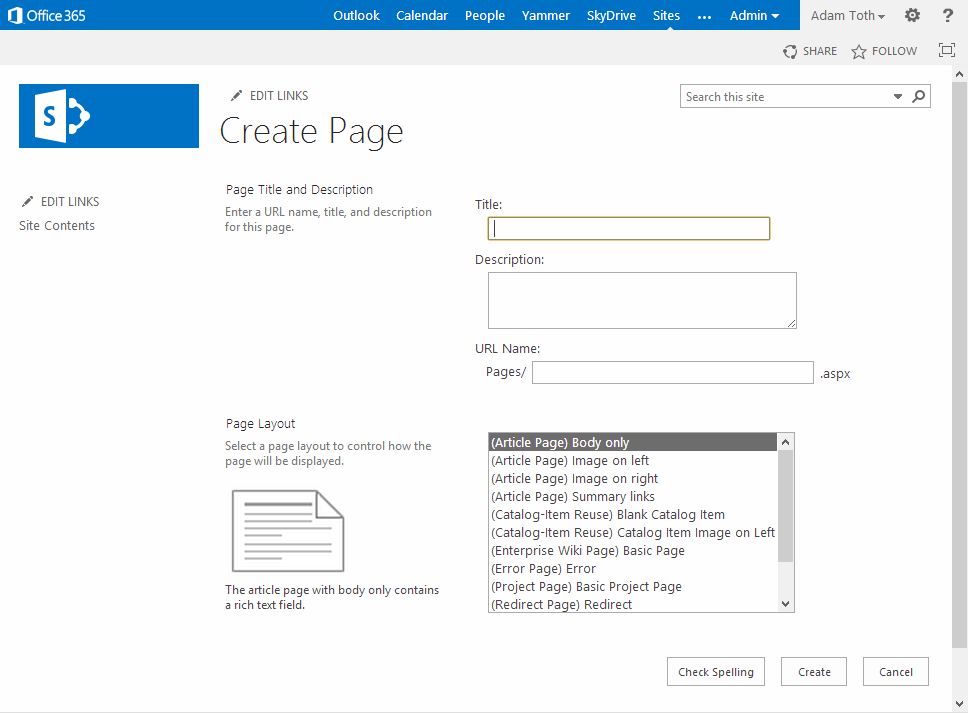
The Create Page Dialog.
Still pretty standard, and all looks good right?
Not quite. Try pulling down the Ellipsis dropdown menu on your newly created page, and choose Edit Properties:
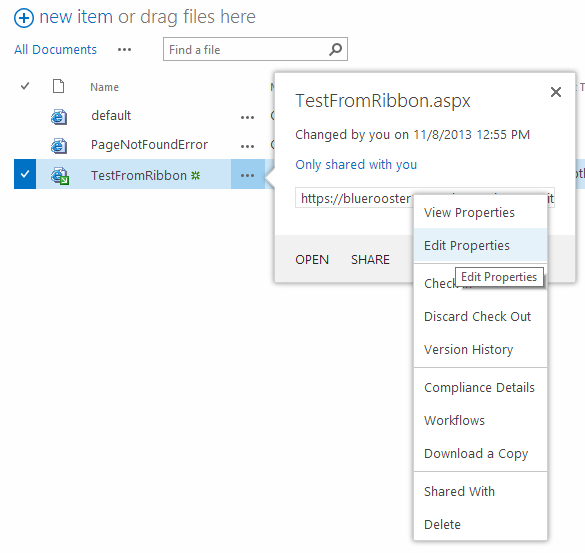
Edit Properties Menu.
BAM! You’ll get a big, fat, unforgiving error:
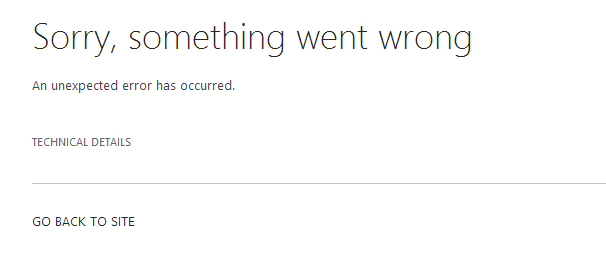
Edit Properties Error.
You’ll also get this error if you navigate to the page, and from the Page editing Ribbon, choose Page > Edit Properties:

Edit Properties Ribbon
The reason you get this error, is because the page is Checked Out, and does not have a minor or major version yet. To get around this, Check In your page first, and then the Edit Properties functionality will work as expected.
Well… er…. that is… as long as your content type doesn’t have any required fields. If your page’s content type has any required fields, you’ll never be able to check it in! Catch-22, you can’t fill in the required fields because the page is checked out and throws an error, and you can’t check it in because you can’t fill in the metadata!!!
OK, so that’s the first problem with this method. Here’s another. You know that really cool new Managed Metadata Navigation feature that gives you search engine friendly urls for your publishing pages? That doesn’t get setup when you use this method. Take a look at the Site Collection Navigation term set. Notice there is nothing there, even though I’ve created a publishing page through the Ribbon:
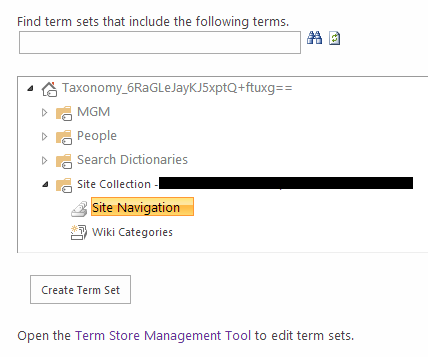
Nothing in Term Store
To set it up, I have to go to the Term Store Management page, add a term, and then link it to my Page. Lots of steps for a content author to have to go through.
Create Pages from Content and Structure
Some content authors have gotten familiar with using the Content and Structure page to manage their site hierarchy. From this administrative page, you can create new publishing pages:

Content and Structure Page
Don’t do it! You’ll get the same results as the Pages Library Ribbon described above.
Create Pages from Site Actions (Settings) Menu
From the Settings menu (the gear icon), you’ll find an Add a Page item:
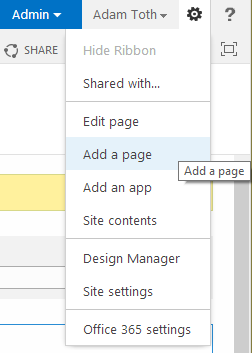
The Add a Page menu item.
When you click this, a pop-up will appear for you to enter the name of the new page. Notice the friendly url that appears as you type (a hint that Managed Metadata Navigation is in play):
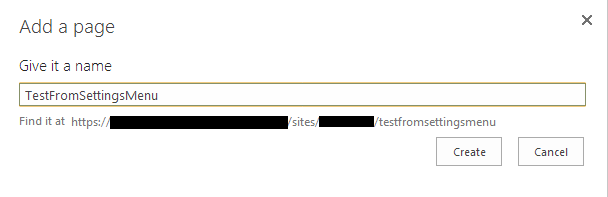
Add Page Dialog
After closing the dialog, you are taken to the page, in Edit Mode, ready to add content. The page is checked out to you, however, you can click the Edit Properties button in the ribbon, and there is no error this time!
You can also check the term store and a navigation item will have been automatically added for your page, so you can access your page via a search engine friendly url.
Create a Page from the Page Editing Ribbon
Another way to create a page is when editing an existing page. You can click the New button on the Page tab of the ribbon:
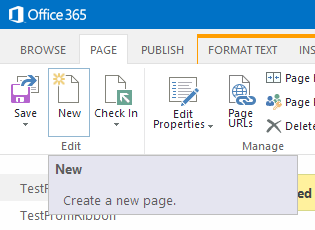
New Page from the Page Editing Ribbon.
This has the exact same effect as clicking Add a Page from the Settings menu, and so is another good option for creating a publishing page.
Summary
If you create publishing pages from the New Document button on the Pages library ribbon, or from the Content and Structure page, you will have difficulty editing the metadata of your page, and will have to go through manual steps to set up search engine friendly urls for your page. Don’t do it!
If you create pages from the Settings menu, or the New page button on the Page Editing ribbon, the SharePoint gods will be happy and bless your pages with error free property editing.
With the recommended approach (using site actions – create page) I still get an error when trying to edit properties. I’m already in edit mode and the page’s checked out to me…. but clicking on edit properties still presents the same error. Using SP2013 on O365 tenant.
Great article thanks.
Question: what would be the correct way of creating a page in SharePoint Designer?
I’ve noticed when creating a page in SP Designer in the Pages library it doesn’t show up in the Managed Metadata Navigation.
Hi,
I am getting the same issue, none of the resolution worked. Please let me know if there is any workaround.
Is this a bug?
Hi,
I got another issue to you.
1 – Create a Root Term and set it as “Simple Link or Header”
2 – Create a Child Term of the previous and set it as “Simple Link or Header”
3- Create a Page and after edit the term navigation to move the page under the Child Term
4 – Go to the page created and use the cog wheel “Add Page” to add a new page at the same level.
You will get an error, apparently because it can’t get the friendly URL.
If you have only a “Simple Link or Header” in your hierarchy all works fine..
Did you exerienced this?
Inspection Depot is uniquely positioned to provide every inspection and insurance claims service, available in the market today, underwriting inspections, daily and catastrophe adjusting, emergency management inspections and more.