In this post, we’ll look at creating an LED style digital alarm clock display, to help add some cool retro visuals to some PowerApps data.
Overview
In this post, we’ll look at how to use SVG images and some formulas to create a digital alarm clock style display in PowerApps. This is going to involve some image manipulation, so I’ll use one of my favorite free vector programs, Inkscape, to create SVG files that can be used in the clock display. I’ll also be using a free-for-commercial use digital clock font for this example (thanks to the author).
- Inkscape: https://inkscape.org/release
- Calculatrix 7: https://blogfonts.com/calculatrix-7.font
Create the Images
For the first part, we will need to create images for each digit of the clock 0-9, as well as the colon, AM/PM, and also a blank image (you’ll see why later).
Download the font to your machine. Unzip the package, right-click the TTF file, and choose Install Font (if you are on Windows).
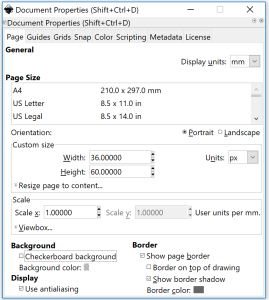
Open up Inkscape, and create a new image. From File > Document Properties, make the image 36 Wide by 60 tall. For the units, choose pixels (px).
Click the Text Tool, and click in the middle of the image. In the toolbar at the top, change the font to Calculatrix 7, and font size to 36. If you don’t see a toolbar, choose View > Show/Hide > Tools Control Bar.
Type a zero “0”. Click the Arrow selection tool. Click the zero. We are going to center it on the canvas. Click Object > Align and Distribute. In the Align box, choose Relative to Page, and then click the buttons to center on the horizontal and vertical axis.
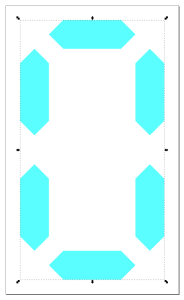
While the zero is still selected, change the fill color using Object > Fill and Stroke. Change the fill color. For this example, I’m using a bright blue LED color, R=90, G=254, B=254, A=255. Your image should look like this:
One last step, is to covert the font to a vector path, this is so that we don’t embed or need the font on the client machine. With the object selected, go to Path > Object to Path.
Save the image as “0.svg“. Repeat this process for the rest of the numbers 1-9.
Create two images for AM and PM (“am.svg” and “pm.svg”). Since these are two characters long, make the AM/PM images 100×60, instead of 36×60.
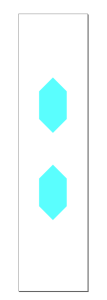
Create an image for the colon separator. I didn’t like the colon in the font, and the pipe character, “|”, and letter i “I” all looked alike. I made a custom implementation by stacking two separate commas on top of each other. I made this image 15×60. Name the image “colon.svg” and save it.
One last image to make. Create an image 36×60 completely blank, and save it as “blank.svg”. We’ll use this one in place of a number when the hour is a single digit.
Setup the PowerApp
Create a new blank canvas PowerApp, choosing the Phone form factor. Go to File, name your App (I called mine LEDClockDemo), and Save it. Always name and save your Apps right away to avoid losing work if your browser crashes!
Import the Images
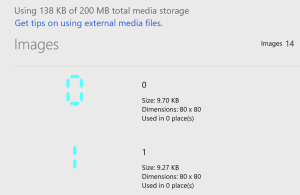
From the File menu of PowerApps, choose Media. Add all the SVG files you created earlier. There should be 14 total images.
Add the Controls
Insert a button on this form, and move it to the top. Change the text to “Fill Data”. We are going to use this button to populate an array of Time objects, for each minute of every day. In the OnSelect function, paste the formula below:
|
1 2 3 4 5 |
ClearCollect(ClockImages,{Key:0,Image:'0'},{Key:1,Image:'1'},{Key:2,Image:'2'},{Key:3,Image:'3'},{Key:4,Image:'4'},{Key:5,Image:'5'},{Key:6,Image:'6'},{Key:7,Image:'7'},{Key:8,Image:'8'},{Key:9,Image:'9'}); Clear(Times); ClearCollect(Hours, [0,1,2,3,4,5,6,7,8,9,10,11,12,13,14,15,16,17,18,19,20,21,22,23]); ClearCollect(Minutes,[0,1,2,3,4,5,6,7,8,9,10,11,12,13,14,15,16,17,18,19,20,21,22,23,24,25,26,27,28,29,30,31,32,33,34,35,36,37,38,39,40,41,42,43,44,45,46,47,48,49,50,51,52,53,54,55,56,57,58,59]); ForAll(Hours, ForAll(Minutes, Collect(Times,Time(Hours[@Value],Value,0)))) |
Invoke the button’s OnSelect action by holding the Alt key down and clicking the button. You should now have an array called “Times” filled with a date/time object containing every minute of the day. You’ll also have an array called “ClockImages” that you can lookup Images by number.
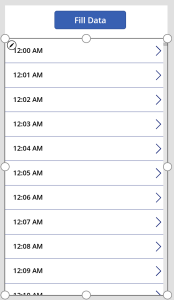
Insert a gallery on to the screen. Change the data source to use the Times array. Change the layout to just display a title only. Your screen should look like this:
Edit the gallery template by clicking the Pencil icon on the first row of the gallery.
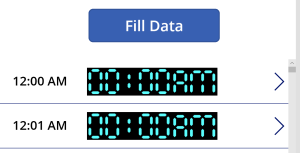
Insert an Image control into the template row. Change the Fill property to Black. Change the Width to 36, and the Height to 60. Set the Image property to ‘0’. Copy this image, and paste it 5 other times into the template row. Arrange them so they are all next to each other in a line. Change the third image to use ‘colon’ in the Image property. Change the last image to use ‘am’ in the Image property. Change the Width of the ‘am’ image to 100 pixels. You should now see something like this:
Add the Clock Logic
Now we’ll add in the logic on each number to control which digits display. We’ll try to account for 24 hour time display based on locale as well.
Click on the first digit. In the Image property, write the following formula:
|
1 |
If(Clock.IsClock24(),If(Hour(ThisItem.Value)<10,'0',Hour(ThisItem.Value)<20,'1',Hour(ThisItem.Value)>20,'2'),If(Or(And(Hour(ThisItem.Value)>=10,Hour(ThisItem.Value)<=12),Hour(ThisItem.Value)=0,Hour(ThisItem.Value)>=22),'1','blank')) |
Click the second hour image. In the Image property, write the following formula. We’ll use a little string manipulation to our advantage, instead of lots of tests with numbers:
|
1 |
If(Or(Clock.IsClock24(),And(Hour(ThisItem.Value)<=12, Hour(ThisItem.Value)>0)),LookUp(ClockImages,Key=Value(Right(Text(Hour(ThisItem.Value)),1))).Image,LookUp(ClockImages,Key=Value(Right(Text(Hour(ThisItem.Value)-12),1))).Image) |
Click the first minute image. In the Image property, write the following formula. The minutes are much easier to do, we can just grab the first or last character and convert to a number:
|
1 |
If(Len(Text(Minute(ThisItem.Value)))=2,LookUp(ClockImages,Key=Value(Left(Text(Minute(ThisItem.Value)),1))).Image,'0') |
Click the second minute image, and place the following formula in the Image property:
|
1 |
LookUp(ClockImages,Key=Value(Right(Text(Minute(ThisItem.Value)),1))).Image |
Now click the AM/PM image. In the visible property, put the following formula:
|
1 |
!Clock.IsClock24() |
In the Image property, use the following formula to toggle AM/PM if displaying in 12 hour format:
|
1 |
If(Hour(ThisItem.Value)>12,'pm','am') |
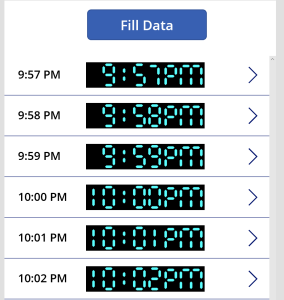
Your clock should now work and look something like this:
Conclusion
In this post, we’ve seen how to build a retro-style clock display with some svg graphics and formulas. We bound actual date time values to our clock, and used the formulas to change the displayed numbers according to the bound date/time.
There are of course questions: How can I easily reuse this on multiple screens? How can I change the color of the numbers without making new images? Right now these are challenges for sure, but as the platform matures, we may get things like custom font support, support for creating custom vector icons, and support for building your own PowerApps controls using React.


